Have you ever wanted to see the beautiful landscapes featured in coffee table books, posters, and travel magazines? This monthly column is here to help you find the most photogenic spots in Israel to do just that.
Welcome to “Capturing Israel,” a monthly guide to capturing Israel’s breathtaking and diverse landscapes through your camera’s lens. This column is designed for everyone — from professional photographers and hobbyists to casual photographers armed only with a cellphone camera. It guides you to the most visually captivating spots in Israel’s diverse and breathtaking landscapes. Each month, I will take you to a seascape, forest, urban landscape, or desert location. Today’s tour is to Ashkelon. Let’s go!
About Ashkelon
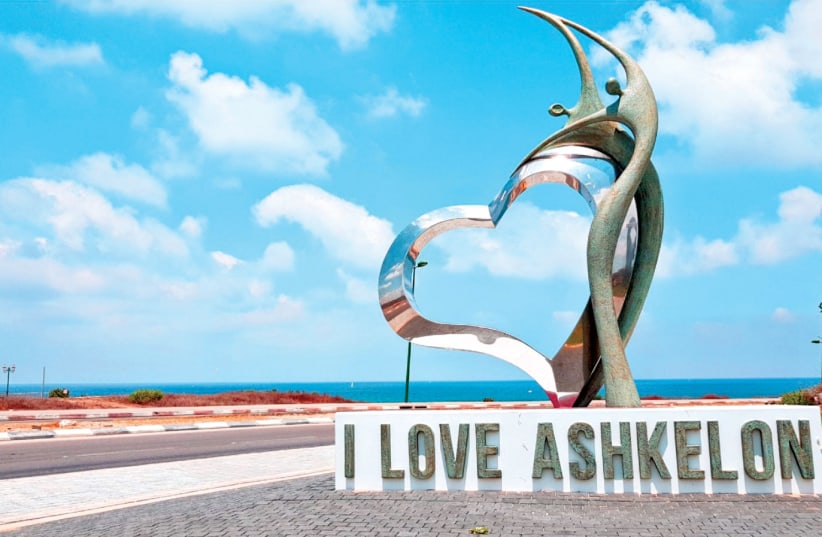
This 4,000-year-old city has much to offer. It takes pride in its history; the ancient Philistine civilization is buried beneath its sandy landscape. The city was where Samson fell in love with the Philistine Delilah and was betrayed by her, and where Herod was born. Art sculptures are on every traffic circle. They are a bit kitschy and colorful and always entertaining. One avenue in particular is loaded with public art worth looking at. It is Ben-Gurion Boulevard/Sderot David Ben-Gurion.
Ashkelon offers seascape photography at its best. So, let’s go to the sea. Today, I’m guiding you to Delilah Beach and the boat marina on a stretch of shoreline a quarter of a mile north of Antiquities Park. Entrance to Ashkelon beaches is free. You will need about three hours to complete photographing everything on this tour. You will be walking on a sandy beach and sidewalk pavement. Sandals or flip-flops are the best choice of footwear.

Getting to Ashkelon
- From Jerusalem
Bus: Take the bus from the Central Bus Station in Jerusalem to Ben-Gurion/Neot Ashkelon, which takes an hour and 15 minutes. From the Ashkelon bus station, take a taxi from the taxi stand to HaShunit Street, which takes 10 to 15 minutes.
Car: Follow Waze to HaShunit Street. The ride is 78 km (49 miles) and, depending on traffic, takes about an hour and minutes. GPS 31.678954, 34.555330
- From Tel Aviv
Tel Aviv Central Bus Station to Ashkelon Central Station. From Ashkelon bus station, take a taxi to HaShunit Street
- Best time to go
The good news is that Ashkelon is a good place to get fine photographs any time of the year, in the early morning and late afternoon. Every season has its charm. The best days in winter and fall are after rain and dark, overcast skies. In spring and summer, look for heavy clouds overhead. Wild surf is the best day and time to go to this beach area for the best seascapes. If the predictions on weather apps are for midday sun, blue skies, and no surf tide, don’t bother; you will not get the best out of what this dramatic location offers.
Weather and waves
There are many online resources for weather and surfing. The minimum surf waves you should look at are 1.8 meters (6 feet). With that surf, thunderous waves crash against the marina stone barrier. The online resources will tell you when waves of various sizes are expected. Check 24 hours before your planned arrival for the predicted time of the largest waves.
You can get information at no cost at Surf Forecast for Ashkelon (https://www.surf-forecast.com/breaks/Ashkelon). There, you can check the hourly and 12-day forecasts. While you are there, don’t forget to note the time of day.
Delilah Beach
When you arrive at the beach, take a moment to immerse yourself in its unique atmosphere. Instead of immediately reaching for your camera, indulge in the joy of exploration. Spend some time observing and discovering. Notice the intricate design and layout of the public space — the sea barriers in front, the lifeguard stations straight ahead, and the charming sun shelter behind them. Pay attention to the people around you: casual walkers, bathers, and surfers all add to the vibrant tapestry of the scene.
Understanding the environment is essential to elevating your photography from simple snapshots to artistic interpretations. As you walk around, think about how you can simplify the scene. Remove distractions and focus on the crucial elements. It might mean excluding particular objects from your frame to highlight what’s truly important.
Remember, the goal is to capture what you see and convey what you feel. This distinction can transform your work from a mere photo into a captivating piece of art. Once you’ve taken the time to really see the location, you’ll be ready to start photographing with a fresh perspective.
Even if you never visit this particular beach, the lesson of taking a moment to look before you shoot can be applied to any location. It’s a critical practice that can profoundly enhance your photography.
Marina barrier wall
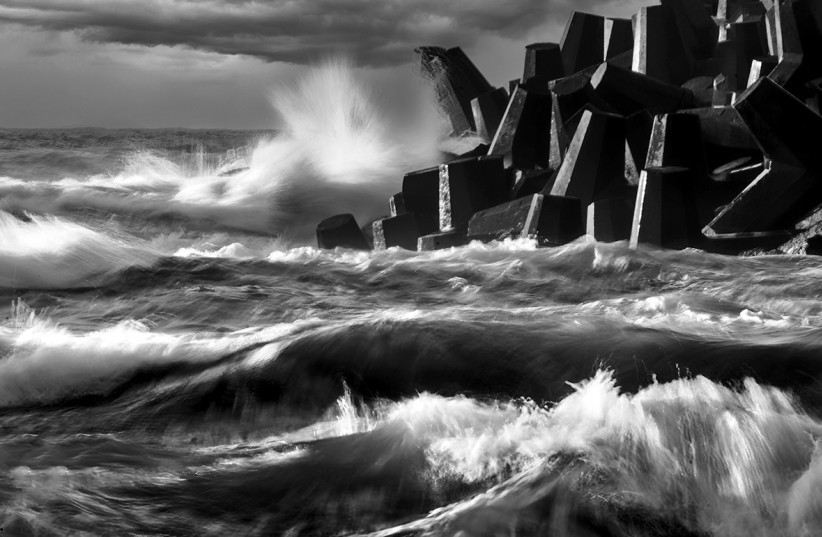
Make your way down to the beach area shoreline from the parking lot. You will have an excellent view of the jagged stone barrier protecting the marina. During his surf tide, the water smashes the barrier with waves and spray that make a dramatic image.
Photo tips: There are two ideal locations to capture this. The first is on the large rock platform on the beach. From this vantage point, you will have height if that is the image you want to capture. The other, and my preferred location, is on the shoreline. I do not advise entering the water when shooting. The water under these high wave conditions can take you, your tripod, and your camera out to sea in a heartbeat and without warning. The sand under your feet will be pulled out from under you. To get the image you see here, your exposure time will be a minimum of 30 seconds and as much as two minutes, depending on the time of day and the filters you use. You cannot maintain stability standing in the water for that long period.
Speaking of filters, here is what I recommend: Besides reducing reflections, a polarizing filter will improve sea surface colors and enhance cloud details. You should have an ND (neutral density) filter in various strengths (ND2, ND4, and ND8) that allows you to control the exposure time. With these filters in your camera bag, you can take this show during the day. If you don’t have these filters, shooting them before sunset is best, as you lose sunlight.
I placed my camera at this GPS 31.679392, 34.554579 to get the shot of waves breaking against the marina.
Ship to shore
From where you shot the waves breaking against the marina, continue walking along the beach for about 100 meters (300 feet). You will see several sea barriers made of stone to prevent water from eroding the beach. To capture the details in this photograph, you must be there early or just before the afternoon blue hour. All day and night, ships pass this route heading from the Port of Ashdod, a distance of 37 nautical miles. Wait until the ship’s navigation position lights are lit and visible to get the best shot. For this image, the water was very calm and was taken during the blue hour just after sunset when the sun was below the horizon. A tripod, as well as ND and polarizing filters, are required to capture the pools of water in the foreground with no reflection.
Beach shelters
From the shoreline, walk across the beach toward the Sea Park, about 100 meters (300 feet). From this point of view, you can capture the beautiful architecturally designed beach shelters, the water, and the sailboats’ masts in the marina. Depth of field is critical here. It would be best if you aimed for F/11 and higher. This can be shot hand-held, and moving around the beach shelters is essential to finding the best vantage point. I recommend a wide-angle lens to get everything in the frame.
Eccentric staircase
Ashkelon has many eccentric outdoor sculptures, and none more so than a staircase that goes nowhere. I shot this in direct sunlight, which created contrast and powerful black-and-white images.
To get a good vantage point and a shot of this staircase sculpture, walk from the marina parking space on HaShunit Street to the top (one block), then turn right on Yefe Nof Street. Walk about 100 meters, and you will be in front of the sculpture at the edge of the Sea Park. Here are the exact GPS coordinates: 31.677655, 34.555517
Marina walkway
After shooting the beach area, walk past the parking lot where you came in and onto the marina walkway. The walkway footpath separates the marina from the Mediterranean. From this location, you can shoot the clouds over the water on your left or turn to the right and shoot the boats and their masts moored in the marina. Here is the GPS location where I shot those two images. GPS 31.682811, 34.554450
Like so many photography opportunities everywhere, especially the Ashkelon seashore, you get the best results in cloudy weather, before or after a rain downpour. I use ND filters to calm the water and polarize filters to get the most out of the clouds.
The photo of the marina is impressionistic, as it was captured using the intentional camera movement method (ICM). I often use this method to create a painterly effect of a subject that would seem dull otherwise. There is no need for a tripod. You can use any camera and lens configuration you are comfortable with. The trick is to have the exposure for not less than 1/3 of a second, and preferably three seconds. You will want to use your ND filter in full daylight or shoot in the early evening when you can achieve the three-second exposure. With that all set, when you press down on it to take the picture, shake the camera by panning it left to right quickly, up and down, or a combination of quick moves. For a seascape like the marina, it’s best to move the camera horizontally from side to side during the exposure. You’ll get the hang of it after unsuccessfully shooting your first 10 images. After that, it is pure art.
With this done, we are off to another location next month. ■
Jay Garfinkel is a Jerusalem fine art still life and landscape photographer who has exhibited widely in the United States and Israel. His work has been featured in Landscape Photography Magazine and LensCulture online magazine. To view his work: https://jaygarfinkel.zenfolio.com/ © 2024 Jay Garfinkel
